
BLOCK
PRINTING
A retreat from the chaos
of bustling Jaipur to explore
the art of traditional
Indian block printing.
By TARYNNE MINGIONE
I am easily distracted by anything colorful, intricately detailed and one of a kind. It’s no surprise the various textiles I ran my fingers across during the many months we were in India kept me tirelessly impressed and continuously fascinated in how they were made.
I would quietly study their design and how the dyes pressed gently into fabric created a unique fingerprint impossible to be exactly replicated. In markets all across the country, various fabrics and textiles hung, collecting a layer of character as dust and dirt from the streets was kicked up from rickshaws and cows passing by. Admitting my curiosity would fade into a forgotten moment as soon as we left India, I decided to immerse myself in a course that would replace curiosity with a true understanding of traditional Indian block printing.
I signed up for a block printing workshop in Bagru. Bagru is a small city 30 km outside of Jaipur, and is mostly known for its continued use of vegetable dyes and block printing.
A taxi ride took me southwest from the chaos and noise of Japiur, through emptier streets and open countryside. I arrived in Bagru, and spent the first portion of the morning learning about natural vegetable dyes. These dyes have been used for centuries, with some of India’s most sacred and oldest texts, such as The Veda, referring to these dyes.
Natural vegetable dyes are more expensive and more difficult to use than their chemical counterparts. Everyone likes easier and cheaper, so go figure that natural dyes are on their way out.
Bagru is one of the areas in Rajasthan that continues to use vegetable dyes and continues to support the art of block printing using natural dyes. While the process may seem cumbersome, particularly when there is a chemical and machine alternative available, there is undoubtedly no superior process to this one that embraces natural and artisan skill.
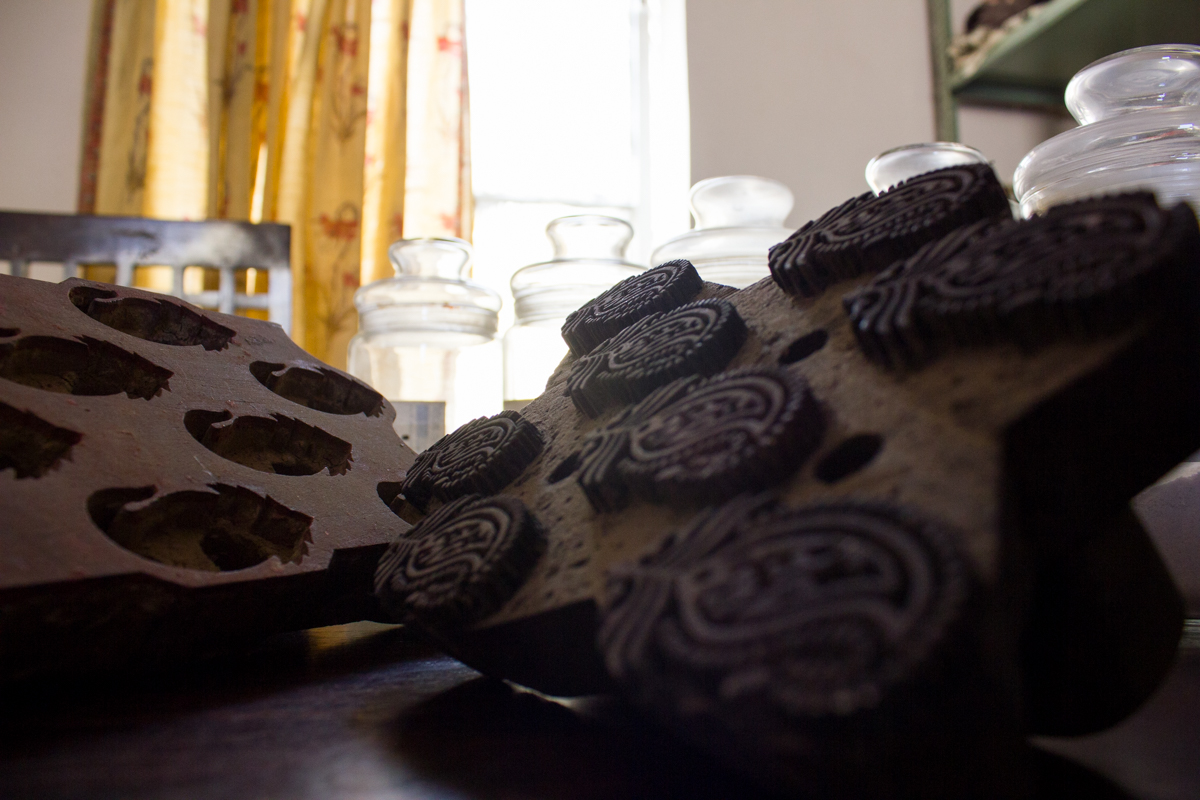
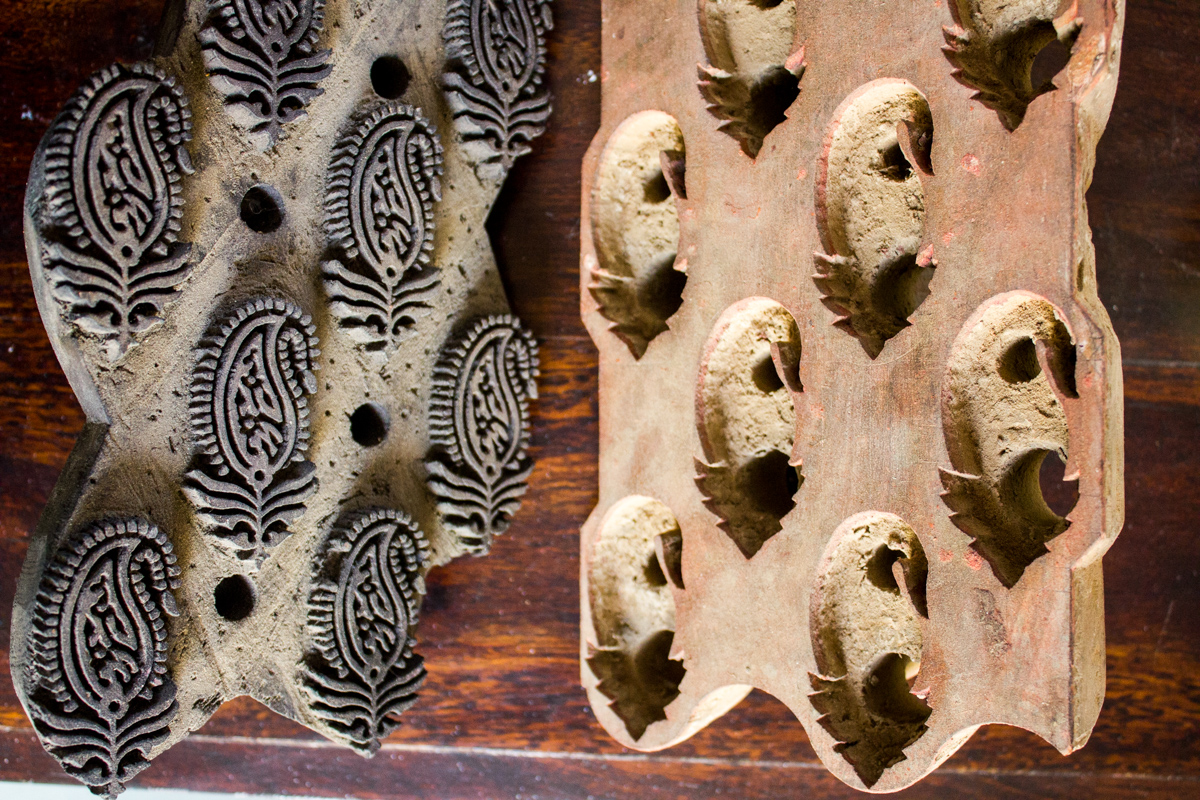
Clean printing stamps set out to dry.
// Since the 19th century and the introduction of synthetic dyes, the use of natural vegetable dyes is steadily declining.
Step 1:
WASHING

Cleaning the white cottons before dying.
Gujrat and Maharashtra are two states in India that produce lots of cotton and have an abundance of weaving mills. Punjab and Hariyana also produce cotton, but the regions lack weaving mills.
The artisan I was learning from revealed that cottons used to be washed in cow dung mixed in cold water and were left to soak in that yummy mixture for 48 hours to remove impurities naturally present in cotton. After two days, the fabrics were removed and washed on stones. The final product was clean white, linen-fresh cottons ready for the next step!
// Although there is an abundance of cow dung scattered in the streets and I wanted to suggest they put it to good use, I remained silent as I was told about the present day washing process. //
Ten liters of cold water, 100 mg caustic soda and one liter of acid slurry are combined to make liquid soap that is used to wash freshly woven cottons. That much soap washes 1000 meters of fabric. After soaking 10-12 hours in this soap mixture, the fabrics are removed and ready for the priming steps of block printing.
Step 2:
HARDA DYING
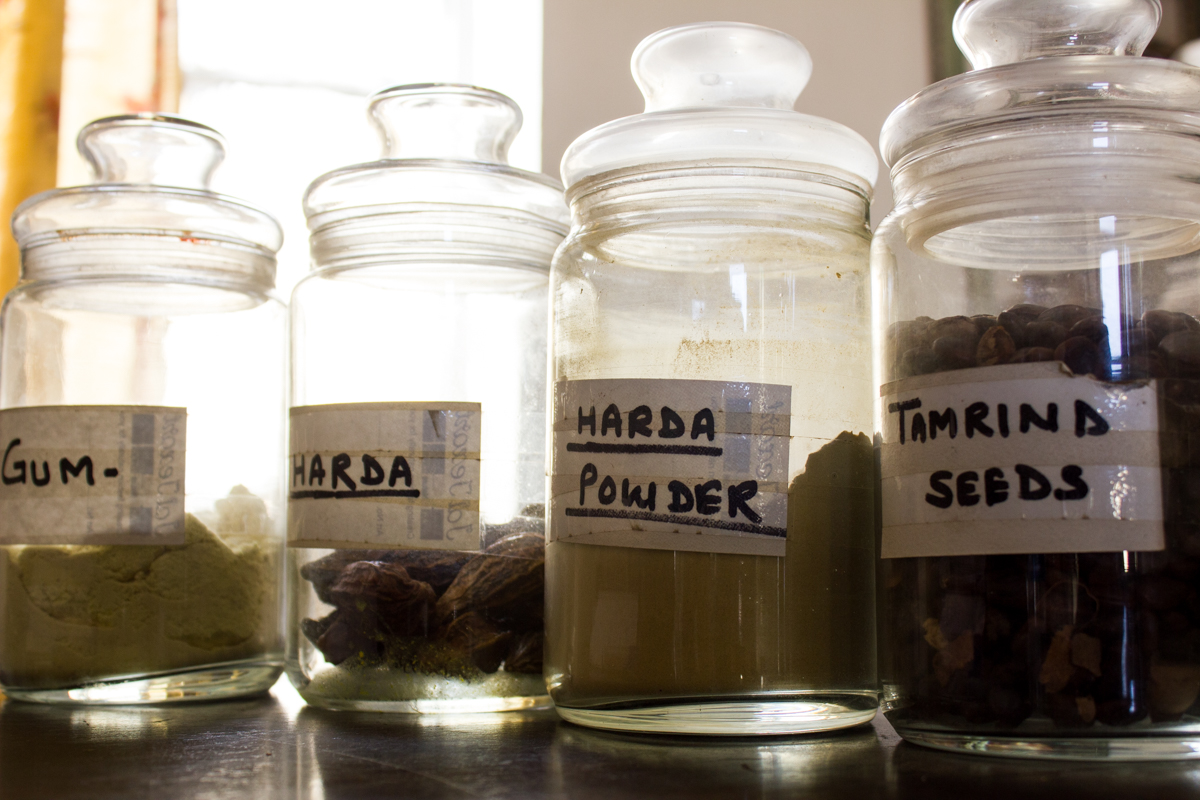
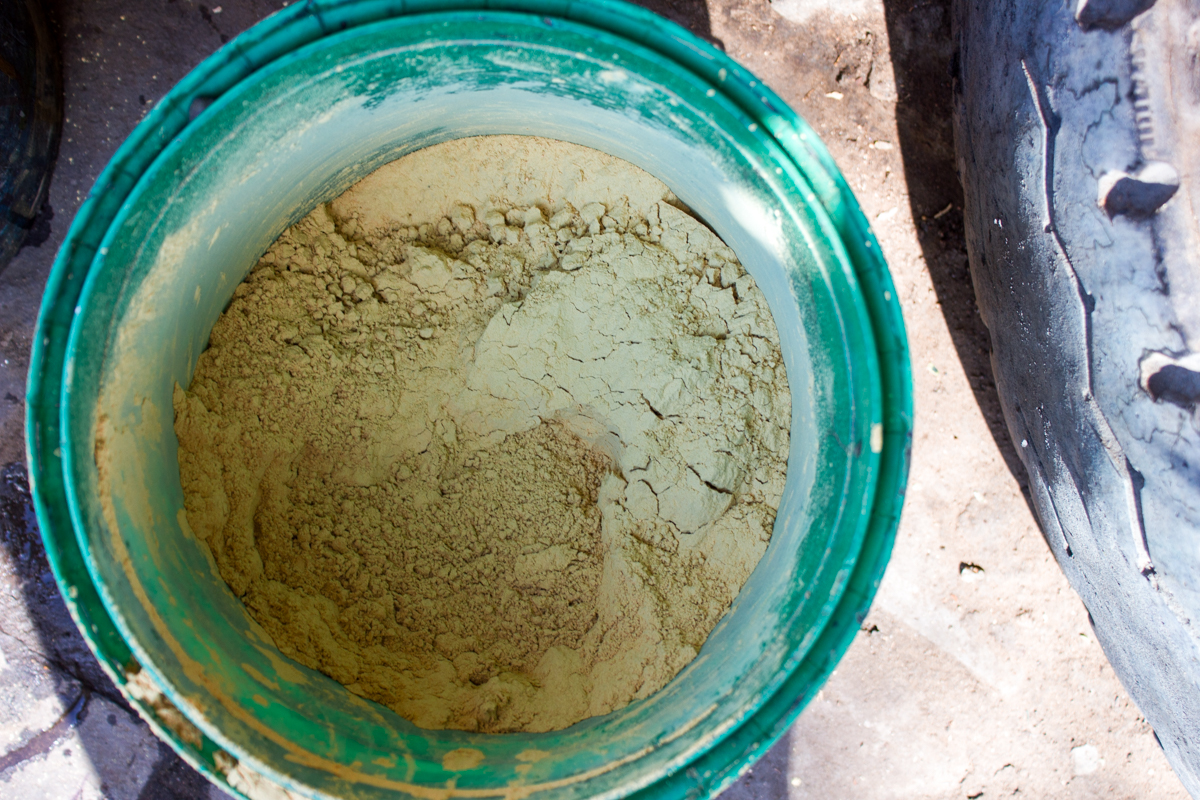
Harda is black myrobalan seed powder, prepared from the harda fruit. This harda powder is a natural mordant, which means it is used to fix dye to the fibers of the cotton. It also improves the take up quality of the fiber and helps improve color and light fastness.
I wasn’t previously familiar with harda fruit, but I could see the powder was a yellow color and I was told it would be used as a base dye for the cotton fabric I would be printing on.
Goa is a major producing center for this little fruit. I was curious how much all of these “ingredients” cost. For just 30 rupees you can get one kilogram of dried harda powder, which can dye 50 meters of fabric.
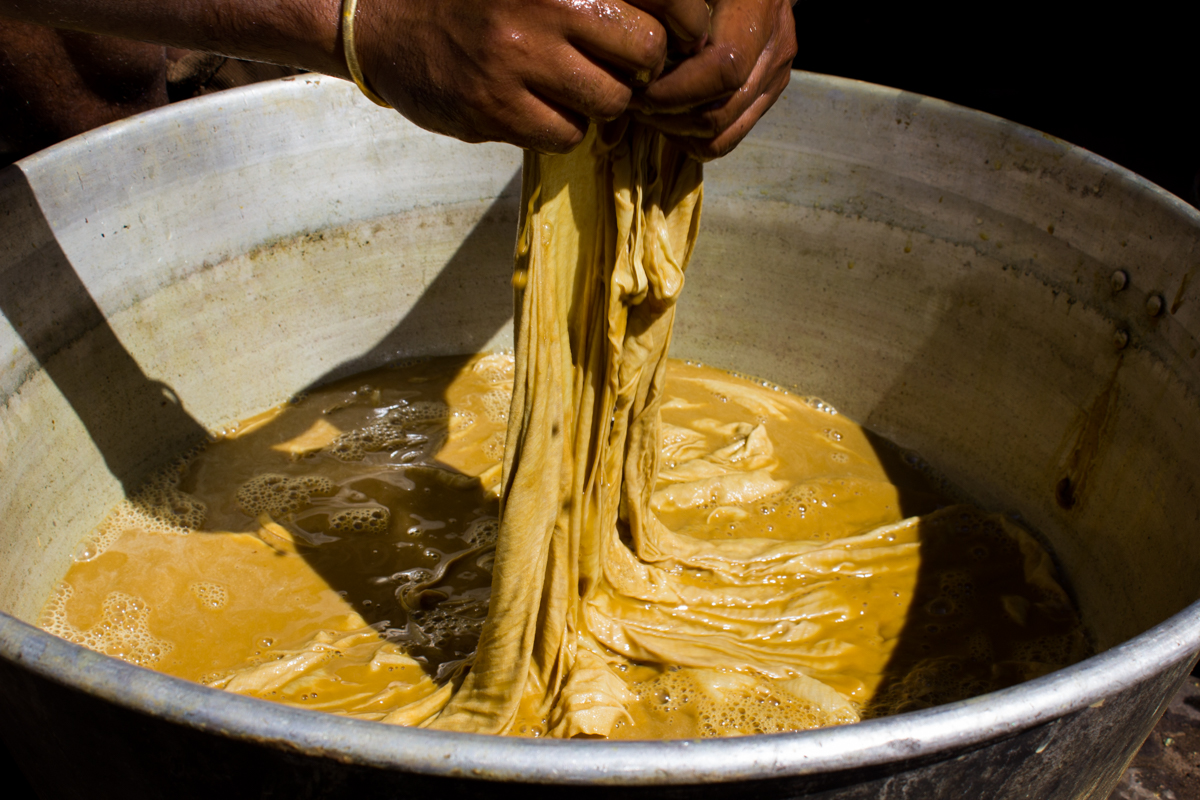
I went outside and watched as my two pieces of clean white, dung-free cotton pieces were soaked in the harda for two minutes before being twisted dry. //
Soaking the cotton in Harda Powder.
Step 3:
DRYING
The now yellow-tinted cotton pieces were laid on the dirt ground and left to dry in the sunshine for nearly an hour. //
With plenty of clothes lines available that would offer a tried and true drying process that wouldn’t require putting clean cotton on dirt, I wanted an explanation. I was told the fabric must be laid on a flat surface rather than hung to dry because the harda would shift downward with gravity, resulting in poor mordant functions and having dye stick variably to the cotton.

Drying the cotton sheets prior to dying.
Step 4:
PRINTING
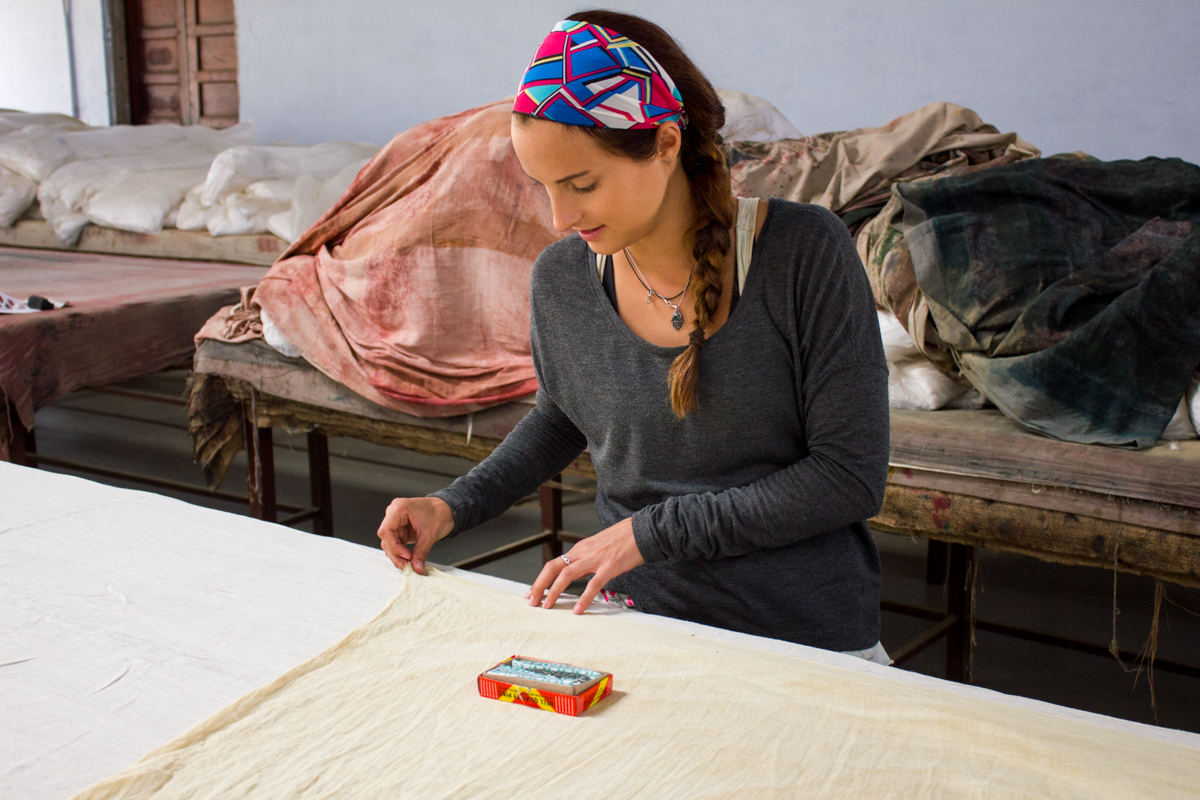
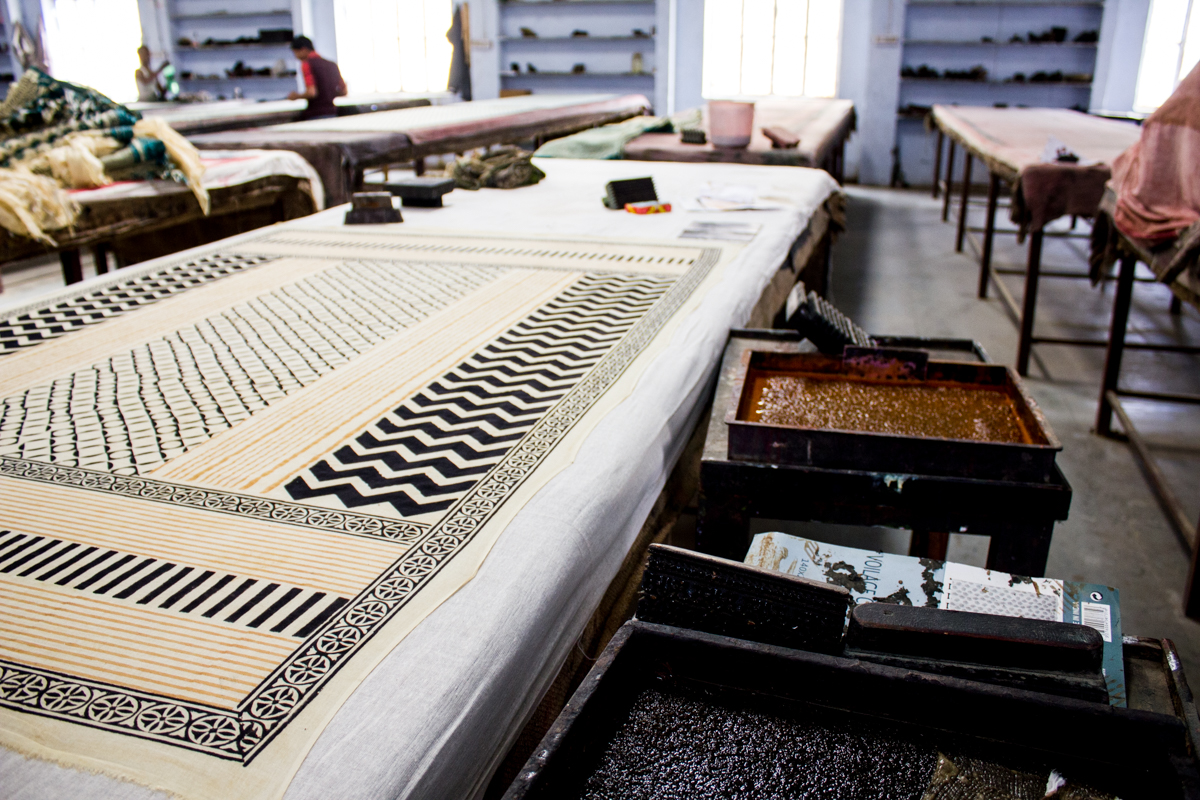
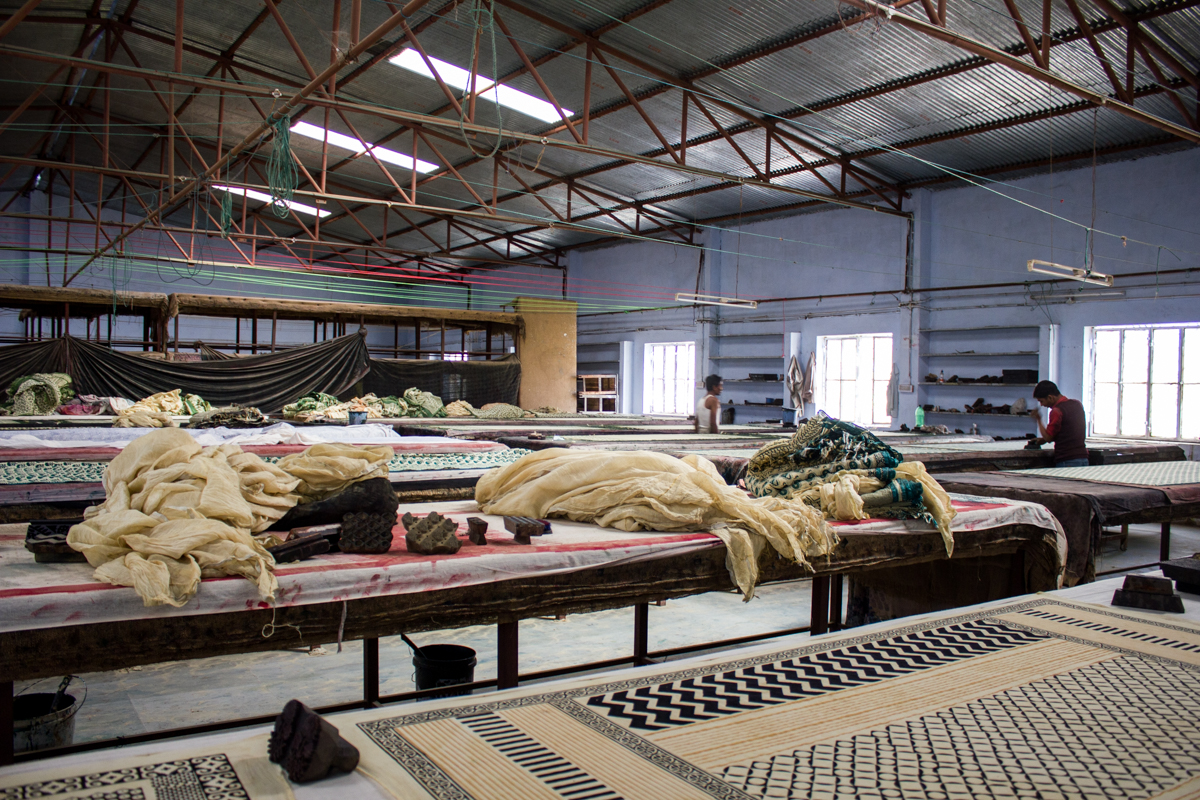
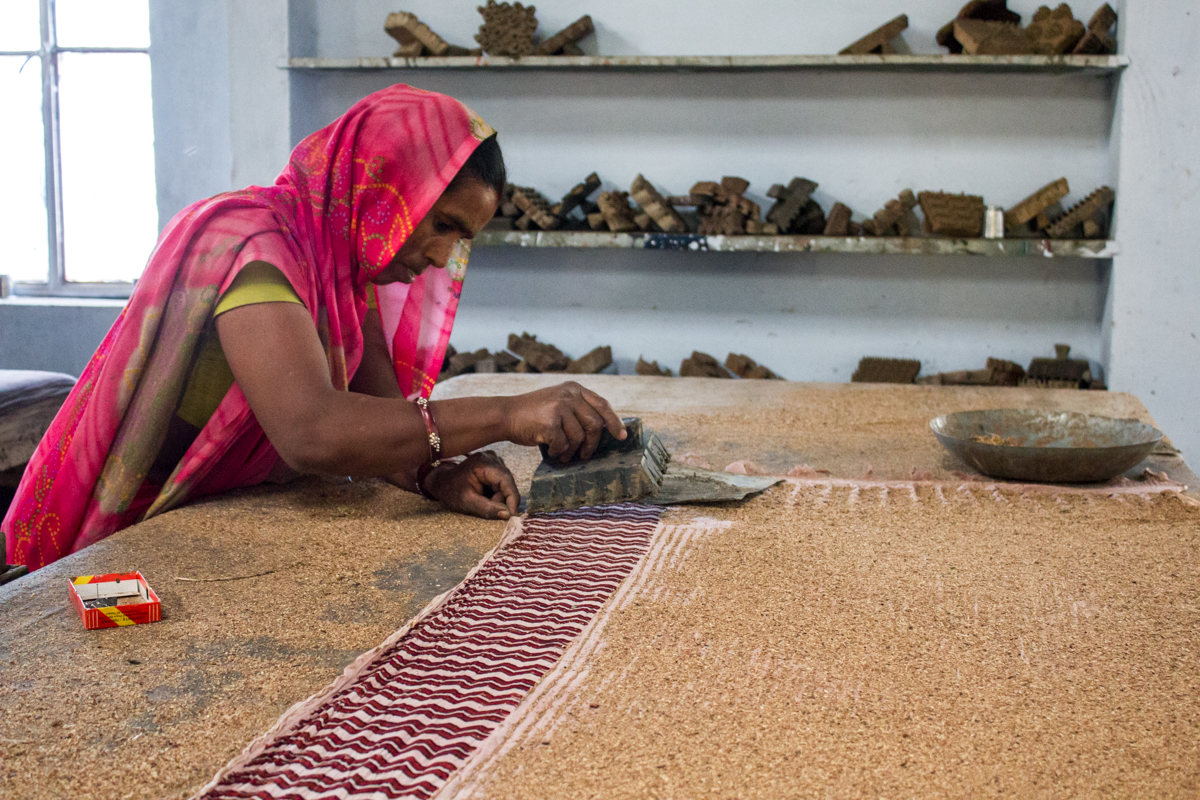
I collected my evenly dried pieces from the earth and carried them inside to the printing room. Traditionally, printing tables were 2×3 feet and just 1 foot above the ground. Thank goodness some traditions change because hovering over one of those tables for more than 6 hours sounds miserable. Present-day printing tables look like a family-style dining room table. The 5-foot-wide, 30-foot-long, waist-high tables are covered with 22-26 layers of hessian cloths under three to four layers of old fabric (acharas) that are changed for every new print.
The wooden printing blocks are created using tiny carving tools and are all sketched and chiseled out by hand. These blocks are what are dipped into thick dyes and used to create beautiful designs as they are pressed carefully onto cotton pieces.
// Small pins and an extra set of hands helped me pin my pieces onto the tables. //
I selected my colors; my options were black, red, brown or multicolor (black and red mix). I chose black and red for one piece and just black (and white) for the other. I’d seen too much brown in India, I definitely didn’t want it on my beautiful new scarves.
Carefully pinning the cotton sheet onto the printing table.
THE NATURAL DYES COME TO LIFE:
BLACK
The black dye is made from black horseshoe nails. The owner of the horse collects the horse clips, then washes and dry brushes them to remove dirt. The clips are burned over a fire for 5-10 hours.
About 30 kilograms of horseshoes (50 rupees for 1 kg) are added to 50 liters of water and 2 kilos of jaggery (juice of sugar cane).
Due to my obsession with kombucha culturing, I could easily understand the chefs notes here. Depending on the time of year, this recipe varies slightly. In the summer only 1.5 kg of jaggery is used since temperatures are much higher and fermentation happens more quickly, about 10-15 days. In the winter, 2 kg of jaggery is used and fermentation takes about 20-25 days.
The fixing agent for black dye is tamarind seed powder. Tamarind is a sweet, soft, tasty flower that is oftentimes used for preparing curry sauce and gravy in Indian cuisine. It grows in lush climates, not the desert region like Rajasthan. Even though it doesn’t grow locally, the powder can be purchased from the local markets at an impressively cheap 30 rupees per kilogram. The tamarind flower is the main source of tartaric acid, and its seeds are ground to create a powder.
To prepare the fixing agent, 1 kg of tamarind seed powder is added to 3 liters of fermented water (water plus jaggery) and then boiled for an hour.
RED
The red dye is created from alum (aluminum sulfate). While that’s not entirely interesting, the fixing agent is. The fixing agent used is natural guar gum, which I recall seeing fields and fields of in India’s Thar Desert. The seeds of the plant are what is ground into natural gum.
To prepare the fixing agent, 1 kg of gum powder is added to 20 liters of fresh water to create a gooey ghostbuster looking paste. For this mixture, 200-800 mg of alum is added, more or less depending on the desired shade. If a lighter shade of red is desired, then less alum is used, alternatively if a deep, rich red is desired them more alum is added.
BROWN
While I wasn’t interested in applying this color to my pieces, I was still interested to learn how it was prepared.
Brown color comes from red kasis, which is a crystal like substance that comes from mines and is dissolved in cold water. To prepare, 1 liter of water is added to 5 mg of red kassis.
The fixing agent for the brown dye is the same as black. One kilogram of tamarind seed powder is added to 3 liters of fresh water and mixed, then boiled and cooled for printing.
MIXTURE
A fourth dye that is used in vegetable printing is a combination of red and black. One liter of black is added to 2 liters of red. This ratio can be increased depending on the desired shade.

Blocking printing in progress.
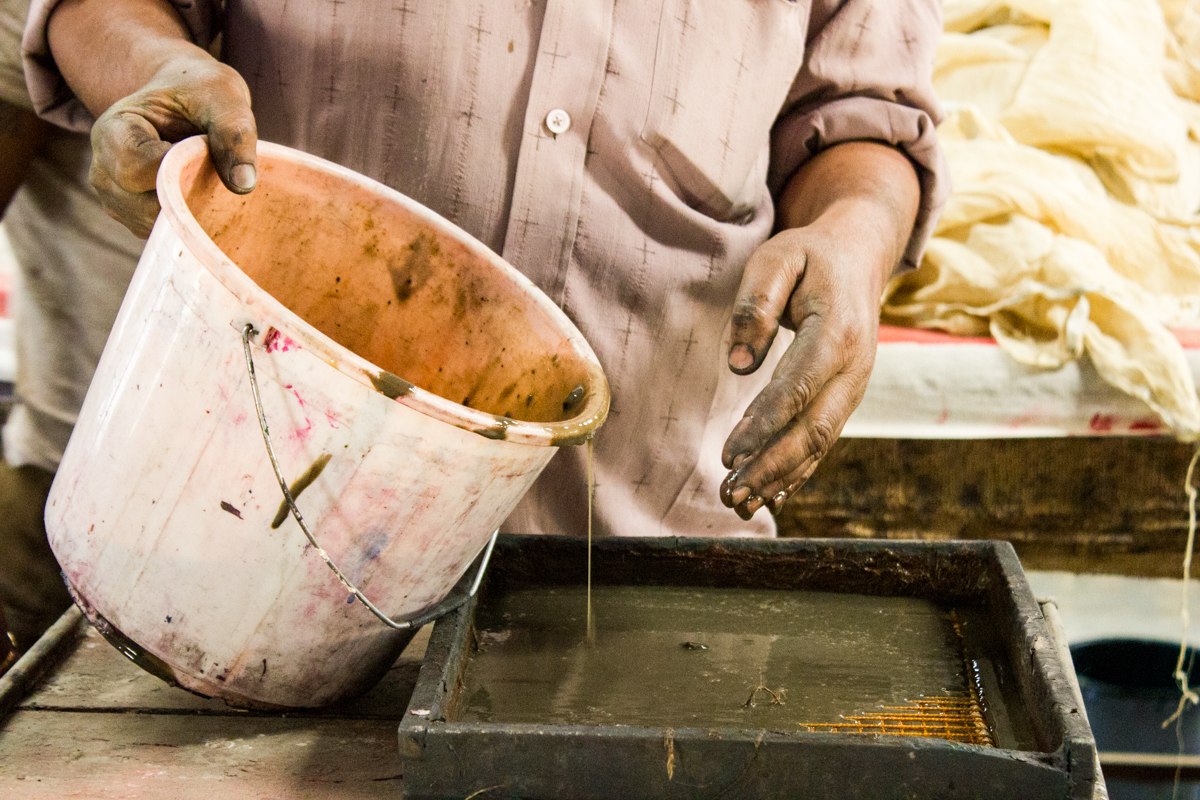
An artisan helped me fill a color tray. The color tray is a wooden box, inside is a metal frame with strings weaving back and forth. Ink is poured into the tray that sits on a wheeled cart. The cart would stay glued to my right hip as I printed left to right in a regimented way.
Now that my color trays were filled, I was finally set free to begin printing!
// I was beyond excited to get my hands dyed and let the creative juices flow. //
The teacher picked up that I could be easily distracted by all the block options, so tried to simplify the process by preselecting blocks for me. He told me I had to use the block he picked, and I responded with a well-practiced Indian head bob, agreeing to disagree. Disinterested in my Martha Stewart craft skills, he snuck away for a chapatti break. While he was gone I went on the prowl for more blocks, and eventually found the jackpot.
Hundreds of uniquely carved stamps were waiting to be selected and bathed in dyes to create beautiful, permanent stories across my pinned and ready cotton sheets.
A young man working in the shop witnessed me rummaging through the block crates. He spoke not a word of English but was entertained at my attempt to create my own unique masterpiece, so he gladly helped.
We succeeded in stamping tiny blocks coated in dye onto the cotton before we got caught. We were advised to switch to a larger block so we wouldn’t have to experience the painstakingly long process of using tiny blocks.
I pretended to oblige, and then as quickly as the tiny stamps can be aligned, finished my pieces while the teacher was once again out of the room. I sealed the final stamp with a high-five to my Indian buddy that helped me disobey his boss.
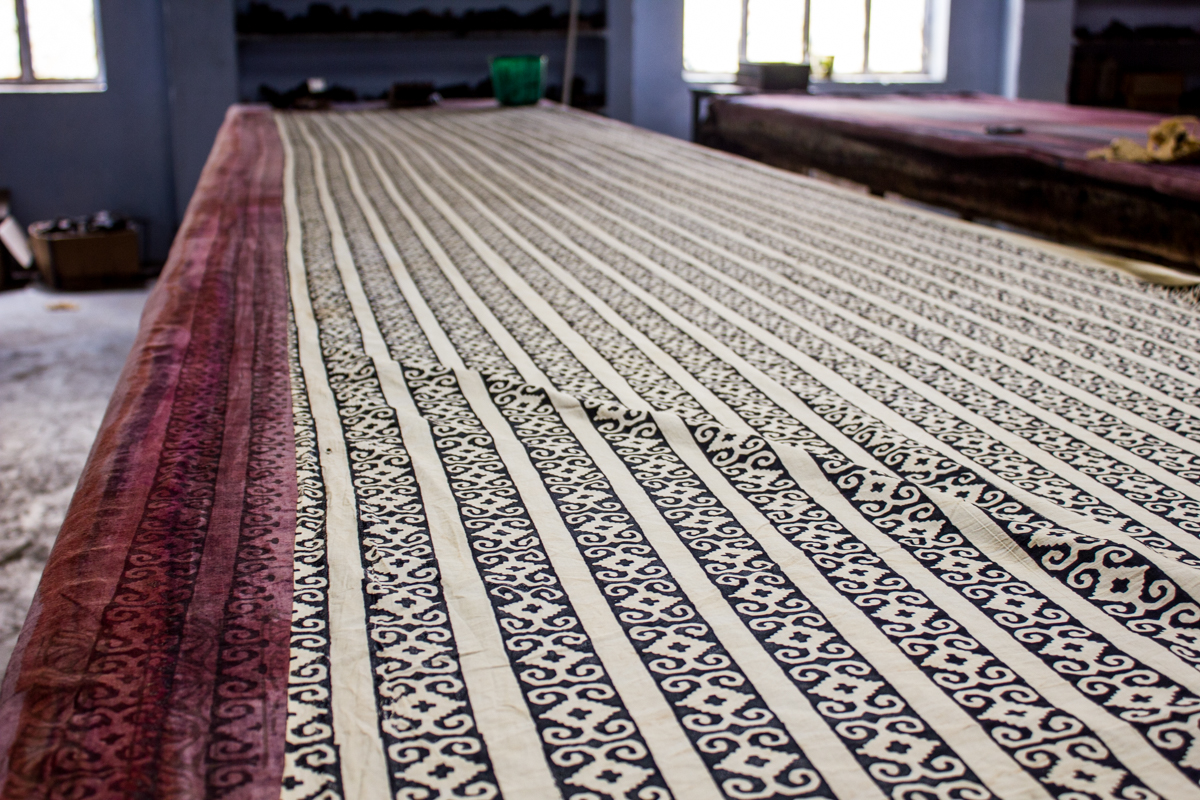
Printed cotton resting on the printing table.
Step 5:
DRYING
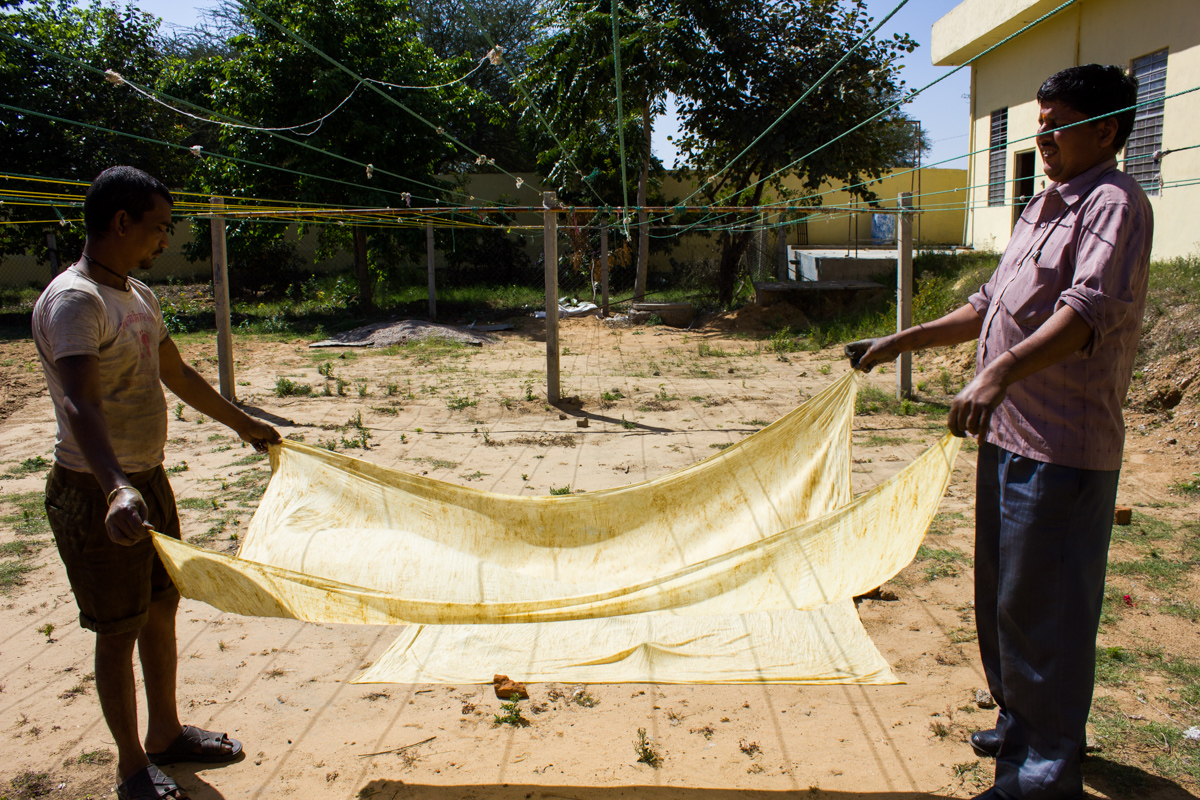
My pieces were left to dry in the sunlight while I waited on the curb. Having forgot breakfast and lunch I sat in the sun talking to my cab driver who was bored out of his mind waiting.
In an attempt to distract myself from how hungry I was, I wandered back into the printing room and ventured to the other printing tables. To my surprise, there was a woman now working on another form of printing, Dabu mud printing.
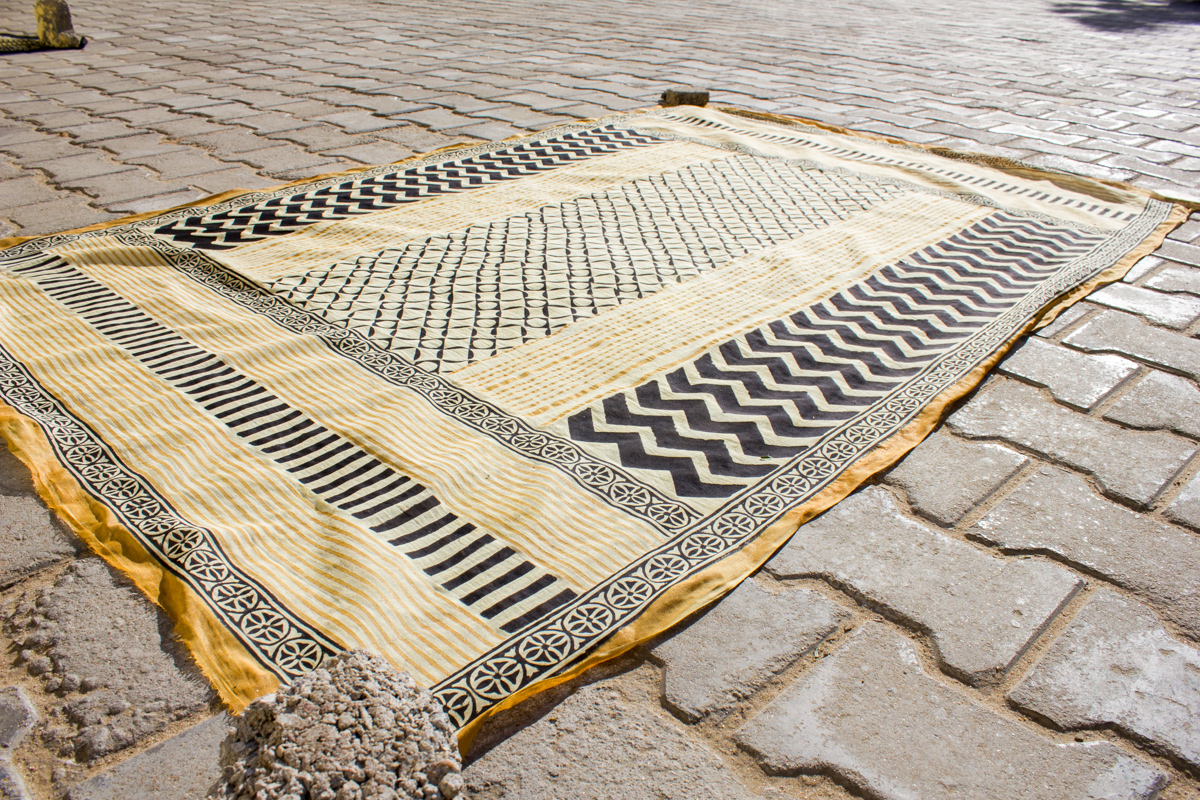
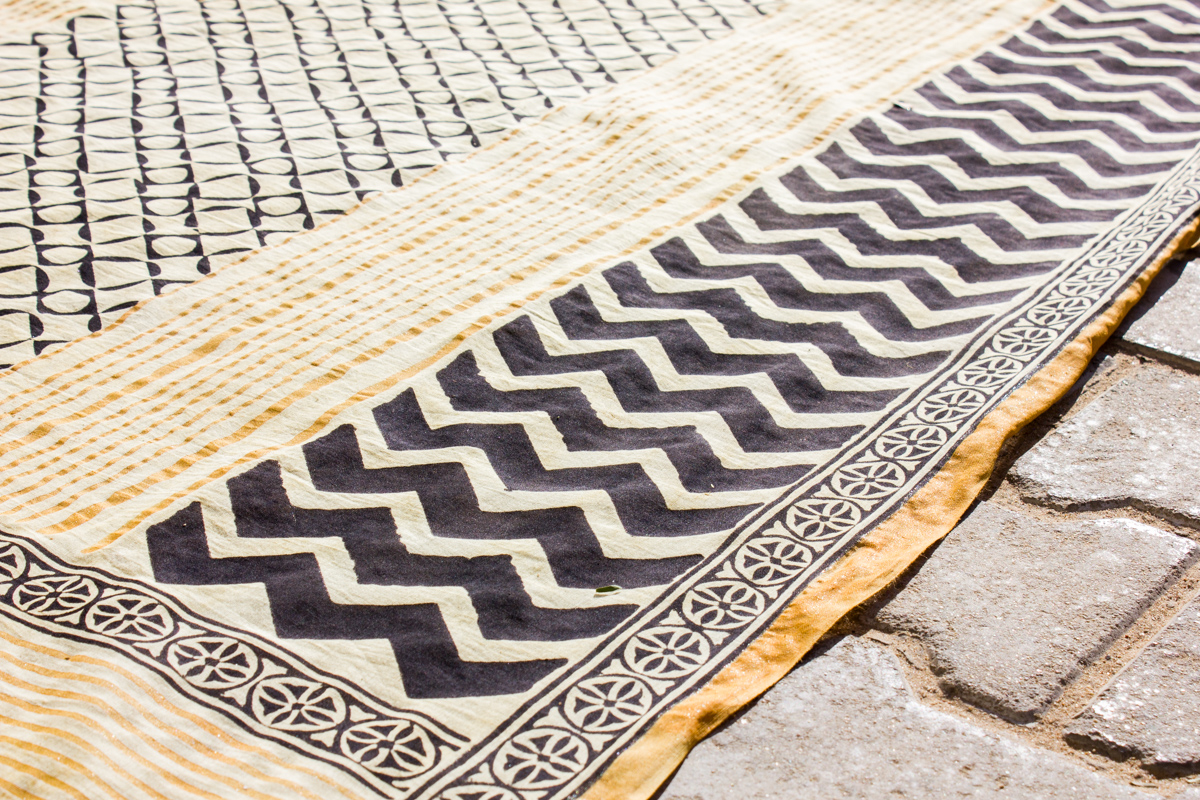
Finished pieces drying in the sun.
Dabu mud printing.
Step 6:
WASHING
After the sunlight performed its job, I collected my pieces and proceeded to the next step. The fabric was washed in cool water to remove any excess color.
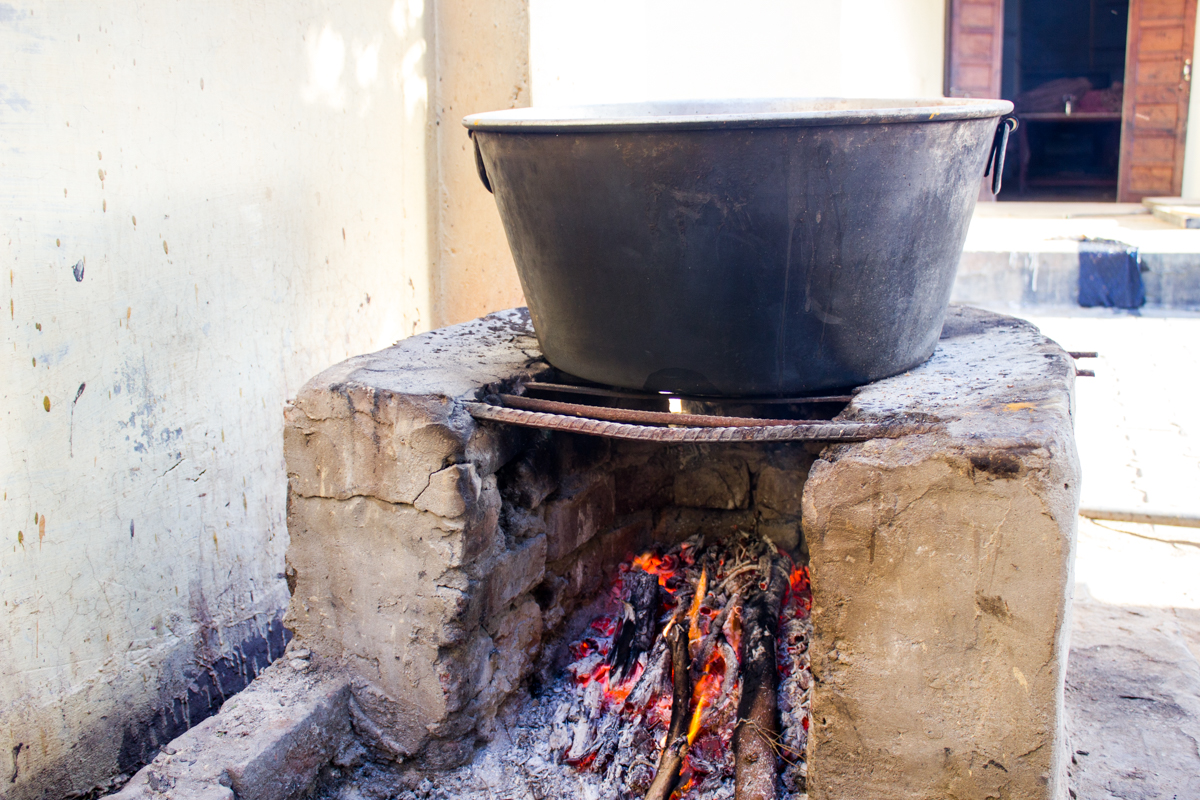
Step 7:
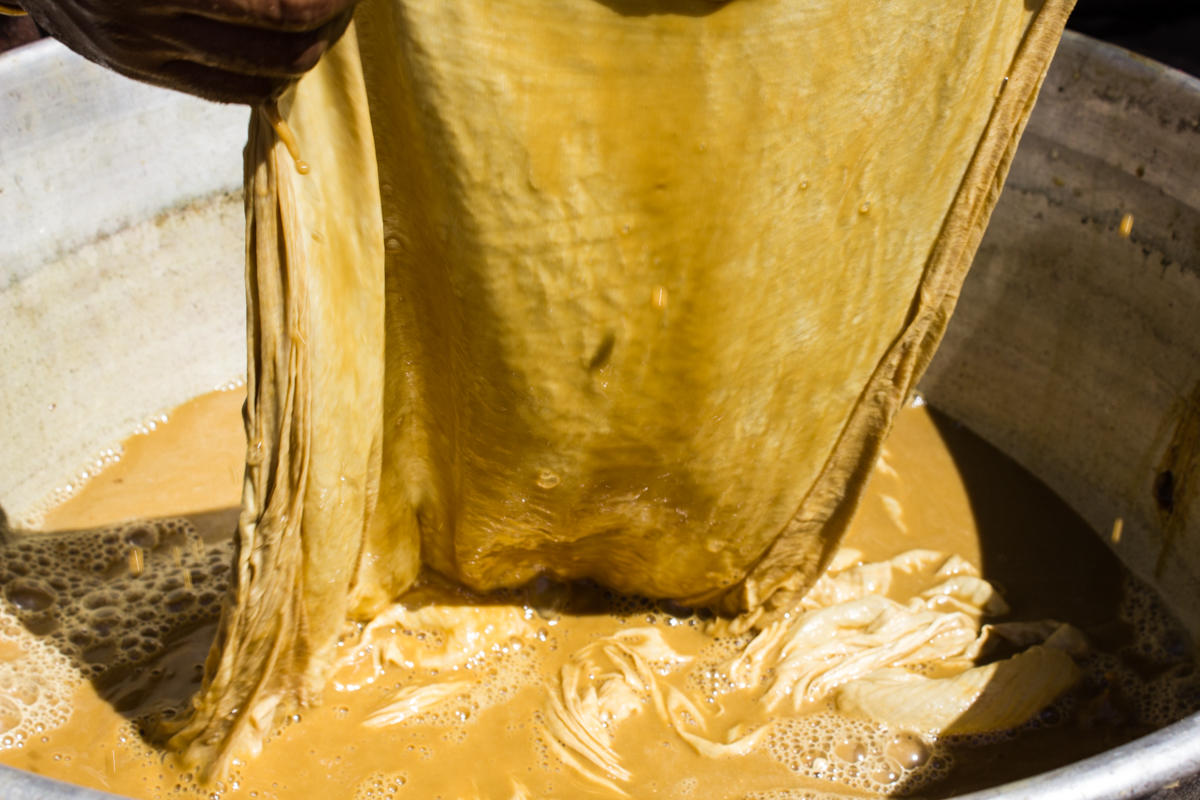
BOILING
The two pieces were then boiled in the last and final step. Copper pots were used, because harda powder would react poorly to iron pots. Dahura flowers were added to the boil to bring out the whiteness of the white cottons and alizarin was added to enhance the reds.
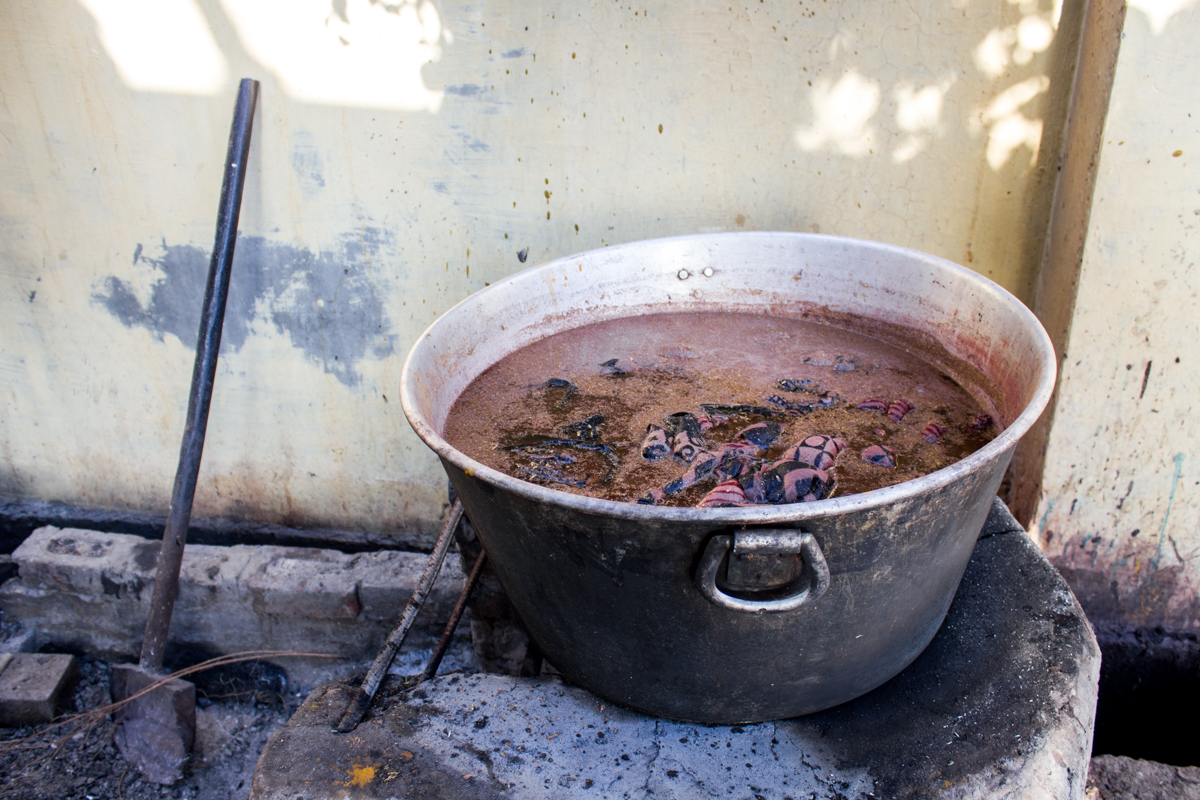
Finished prints boiling to set the dye.
I waited impatiently for my pieces to boil so I could see the final product. After what felt like hours, my prints were finally removed and twisted dry.
// I was incredibly happy with my prints and was amazed at how a natural and traditional process could produce such an intricate piece of art. If you ever find yourself in Rajasthan, I’d highly encourage a workshop to experience and appreciate the beauty of this process.
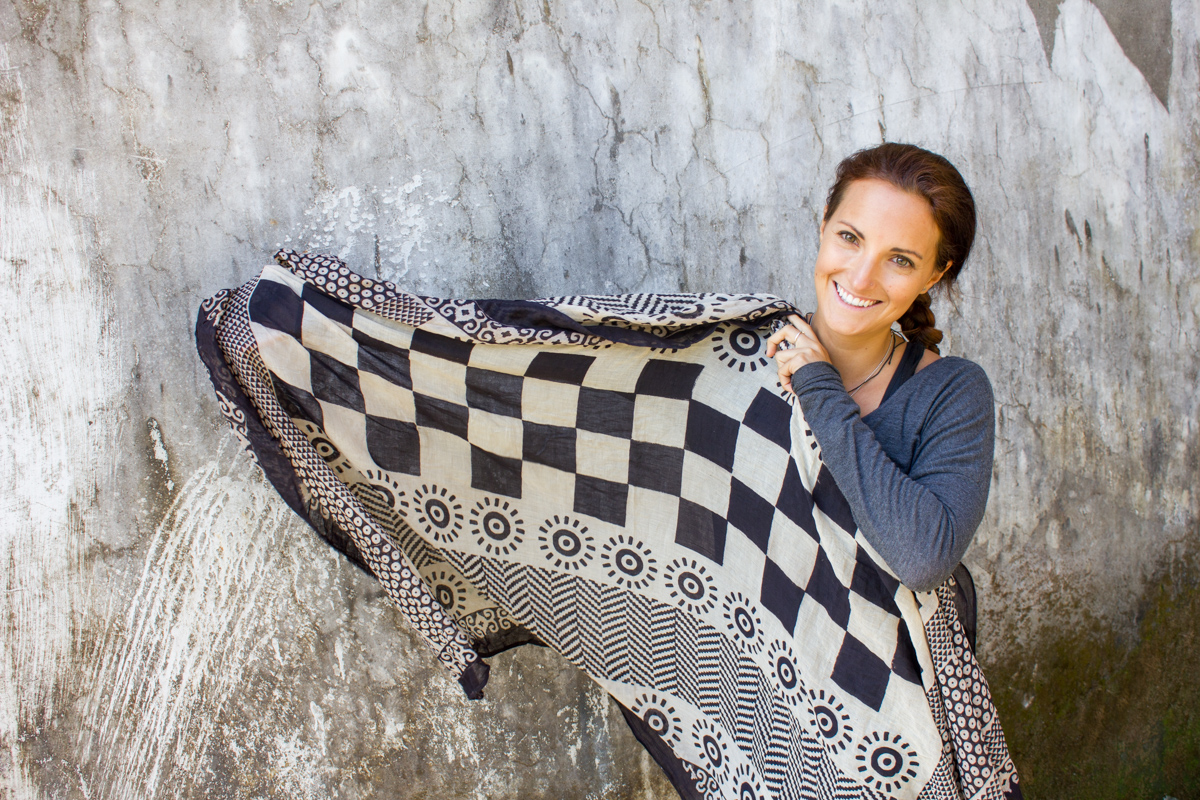
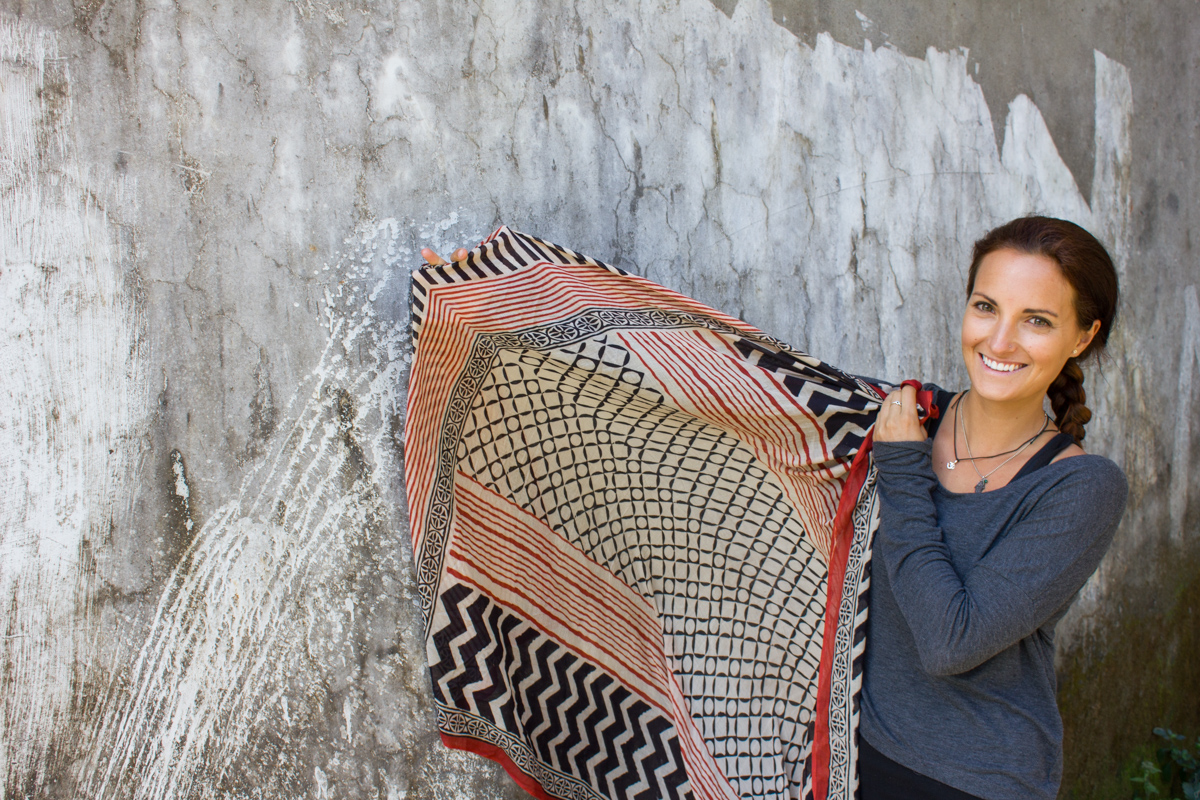

The finished block prints.